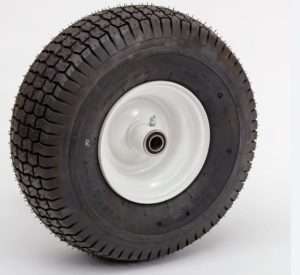
How to break the bead on a lawn mower tire
Breaking the bead on a lawn mower tire is a task that has baffled mankind for centuries. It requires a delicate touch, the strength of a bull, and the patience of a saint. It’s like trying to solve a Rubik’s Cube while blindfolded, with one hand tied behind your back, and a hungry lion nipping at your heels.
But worry not, my friends. I have delved deep into the bowels of the internet to bring you the ultimate guide on how to break the bead on a lawn mower tire. From the basic hammer and chisel method to the more advanced “kick it until it breaks” approach, I have it all.
Why Break the Bead on a Lawn Mower Tire?
There are several reasons why you might need to break the bead on a lawn mower tire
Replacing a Damaged Tire
Over time, lawn mower tires can become worn or damaged, necessitating a replacement. Breaking the bead is the first step in removing the old tire from the wheel.
Fixing a Flat Tire
If your lawn mower tire has gone flat due to a puncture or leak, breaking the bead allows you to access the inner tube (if present) or patch the tire from the inside.
Maintenance and Inspection
Regular maintenance, including inspection of the tire and wheel for damage or wear, may require you to break the bead for a thorough examination.
Safety Precautions
Before you start, ensure you follow these safety precautions:
- Always wear protective gloves and safety goggles.
- Make sure the lawn mower is turned off and disconnected from any power sources.
- Work in a well-ventilated area to prevent fume buildup from any remaining fuel in the mower.
Tools Needed
To break the bead on a lawn mower tire, you’ll need the following tools:
- Adjustable wrench or socket set
- Bead breaker (optional but recommended)
- Flat-head screwdriver or pry bar
- Tire valve core remover or needle-nose pliers
- Rubber mallet or hammer (with a block of wood)
Step-by-Step Guide to Breaking the Bead
Step 1: Prepare the Workspace
Find a clean, flat surface to work on, ideally a concrete or paved area. Make sure you have all your tools within reach.
Step 2: Remove the Lawn Mower Wheel
Using the adjustable wrench or socket set, remove the bolts or nuts securing the wheel to the lawn mower. Carefully slide the wheel off the axle.
Step 3: Deflate the Tire
Remove the valve cap and use the tire valve core remover or needle-nose pliers to release any remaining air in the tire.
Step 4: Breaking the Bead with a Bead Breaker
If you have a bead breaker, position it on the tire’s sidewall near the wheel rim. Apply steady pressure to the bead breaker’s handle, forcing the tire bead away from the rim. Work your way around the tire until the bead is completely separated from the rim.
Step 5: Breaking the Bead with a Manual Method
If you don’t have a bead breaker, you can use a flat-head screwdriver or pry bar to break the bead. Place a block of wood on the outer edge of the tire to protect the rim. Insert the screwdriver or pry bar between the tire and rim, then use a rubber mallet or hammer to gently tap the tool, forcing the bead away from the rim. Move around the tire, repeating the process until the bead is fully separated.
Step 6: Inspect and Clean the Wheel
With the bead broken, inspect the wheel for any damage or debris. Clean the wheel thoroughly to ensure proper seating when reinstalling the tire or mounting a new one.
Tips for Success
- Lubricate the bead with soapy water to make it easier to separate from the rim.
- Take your time and be patient. Rushing the process can cause damage to the tire or wheel.
- Always start on the side of the tire opposite the valve stem to avoid damaging it.
Potential Challenges and How to Overcome Them
Breaking the bead can be challenging, especially if the tire is old or has been on the wheel for an extended period. If you’re struggling to break the bead, try applying more lubricant or using a larger pry bar for additional leverage. If all else fails, consider taking the wheel to a professional for assistance.
Reassembly and Final Checks
Once you’ve broken the bead, completed any necessary repairs or replacements, and cleaned the wheel, reassemble the tire and wheel. Inflate the tire to the manufacturer’s recommended pressure, and reattach the wheel to the lawn mower. Perform a final inspection to ensure everything is secure and properly aligned.
Conclusion
Breaking the bead on a lawn mower tire can be a straightforward process with the right tools and techniques. By following this step-by-step guide and keeping safety in mind, you can successfully break the bead and address any tire issues with confidence.
FAQs
- Can I use a car tire bead breaker on a lawn mower tire? Yes, as long as the bead breaker can accommodate the smaller size of a lawn mower tire.
- How much pressure should I use when inflating a lawn mower tire? Refer to the manufacturer’s recommendation for proper tire pressure, which can typically be found on the tire’s sidewall or in the owner’s manual.
- Can I patch a lawn mower tire without breaking the bead? In some cases, you can use an external plug-style patch for minor punctures, but for a more secure and lasting repair, breaking the bead and patching from the inside are recommended.
- How often should I inspect my lawn mower tires? Inspect your lawn mower tires regularly for signs of wear, damage, or low pressure. A thorough inspection should be performed at least once per mowing season.
- Do I need to balance my lawn mower tire after breaking the bead and reassembling it? Balancing is generally not necessary for lawn mower tires, as the lower speeds and frequent starts and stops do not create the same vibration issues seen in automotive tires.
Regenerate response